
DIY Guitar Iso Cabinet
When you are in any one building for many years, you solve a lot of problems over the years. If you are like us, you solve problems on a weekly basis, and after a while, you have a fairly well oiled machine and you tend to forget all the problems you had to solve along the way to get where you are. The sound your worship team has is usually a product of years of tweaking and adjusting. When we moved into our new facility, a lot of those problems instantly come back. And one of those is a problem that’s common to all of us: stage volume. Stage volume on any given worship platform is typically from one of two sources – Drums and guitar amps. We’ll do another post on our drum solution, but in this post we’ll go over the guitar amps.
This probably goes without saying, but every worship team and production team runs into the problem of the guitar guy wants his amps to be so loud that it makes his tone right, the front of house guy wants the right tone, but can’t mix over the stage volume coming from the amps, and the tech director is stuck in the middle of trying to make it sound good but keep the volume at a manageable level. You are not alone.
Our goal was to make some type of isolation box that allowed our amps to get as loud as they want to back stage and us not to hear it in the worship center. Our second goal was to make sure that the guitar amps didn’t overheat and could last a long time in the boxes. It’s important to note that the first iteration of our amp boxes in the old building sealed well, but didn’t have enough air flow and it destroyed our amps on a regular basis due to heat (to which our music director wasn’t too keen on and for good reason).
So here’s what we came up with:

It’s important to note that it was a small team effort. This is not the quickest project we have ever done, and it takes a little longer than you may initially think. So give yourself a good week to pull it off. The good thing is that all the cuts and joints aren’t that tricky so you don’t have to be too handy to pull this one off.
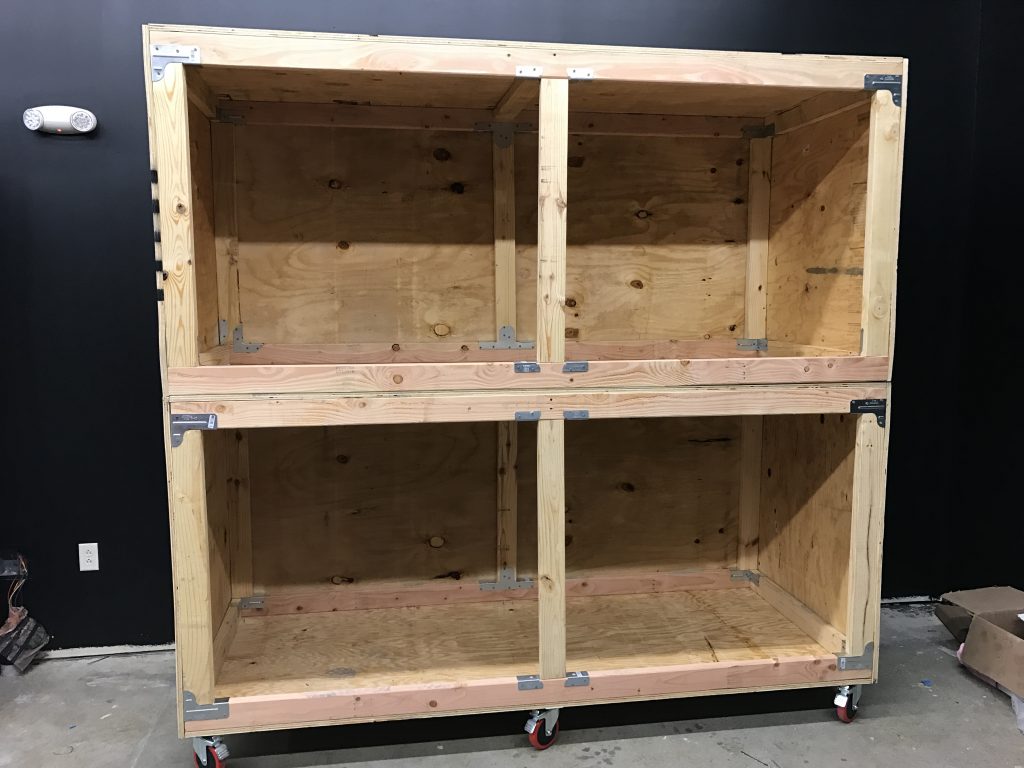
We essentially built the guitar cabinet in two sections, a top and a bottom. The top and bottom we made equal size at 3 feet tall and 8 feet wide. We built the initial frame out of 2×4’s.
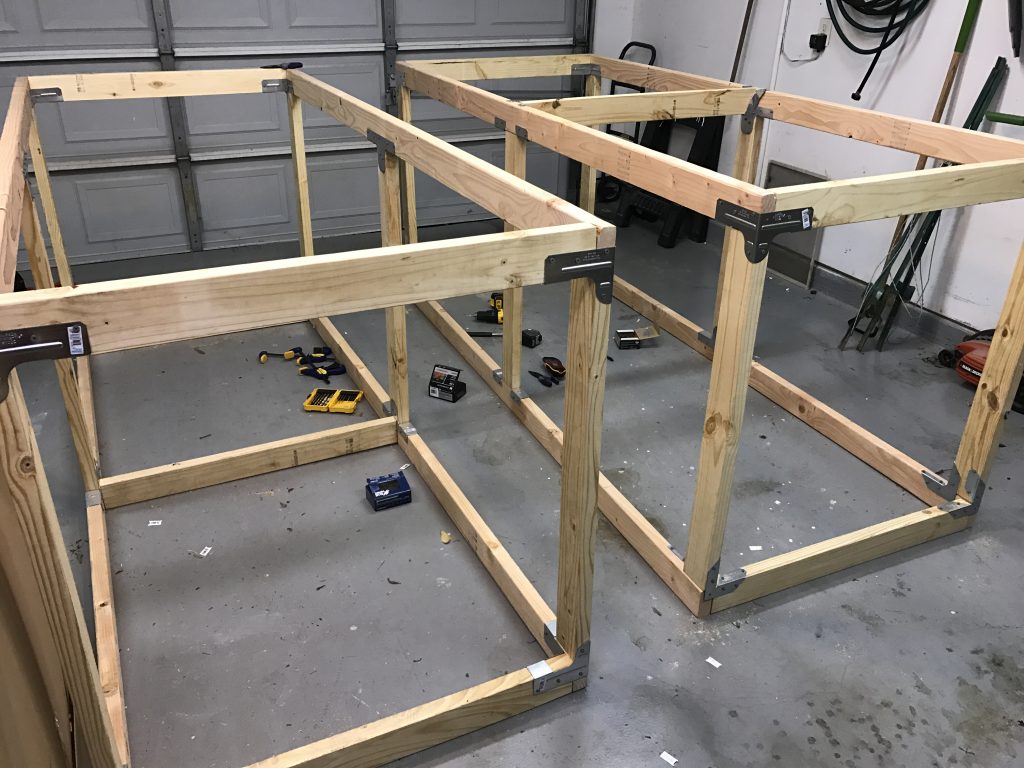
I initially built the frames at home and then had to transport them to the church. I don’t recommend this method as these are massive. It was a feat to get it to the church. I’d definitely recommend building each step near your final location. Hindsight is 20/20 – ha.
Once we had it on site, we put some thick 3/4″ plywood around all the sides, careful to get the edges as tight as possible to keep sound from leaking out. We put 6 heavy duty castors on the bottom (found some awesome looking red ones from Home Depot), stacked them on top of each other, and screwed them together. Even fully loaded down, the cabinets move like butter. We felt pretty legit at this point. However, the hardest part was yet to be done.
One of our goals was to make sure that the amps stayed cool enough when the doors were closed and the amps were powered up all the way. So after much discussion and probably a little bit of arguing, we landed on a pretty decent idea. Here’s a rough picture of the air flow, but the idea was push air in one side and pull air out the other. The problem with fans though is that noise gets out through the grates. So we put a sound panel in front of the fans to help absorb the sound more. The result was pretty fantastic.

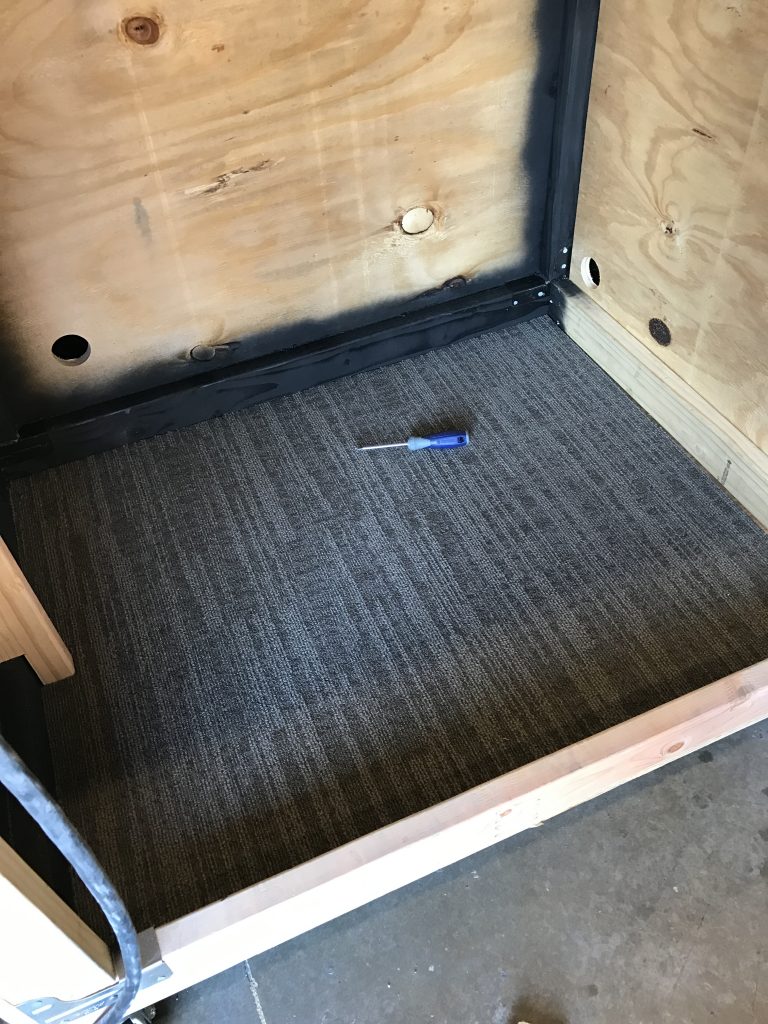
We then caulked all the creases between the 2×4’s and the plywood. After that we hit the 2×4’s and joining areas with black spray paint and put some carpet squares on the bottom plywood.
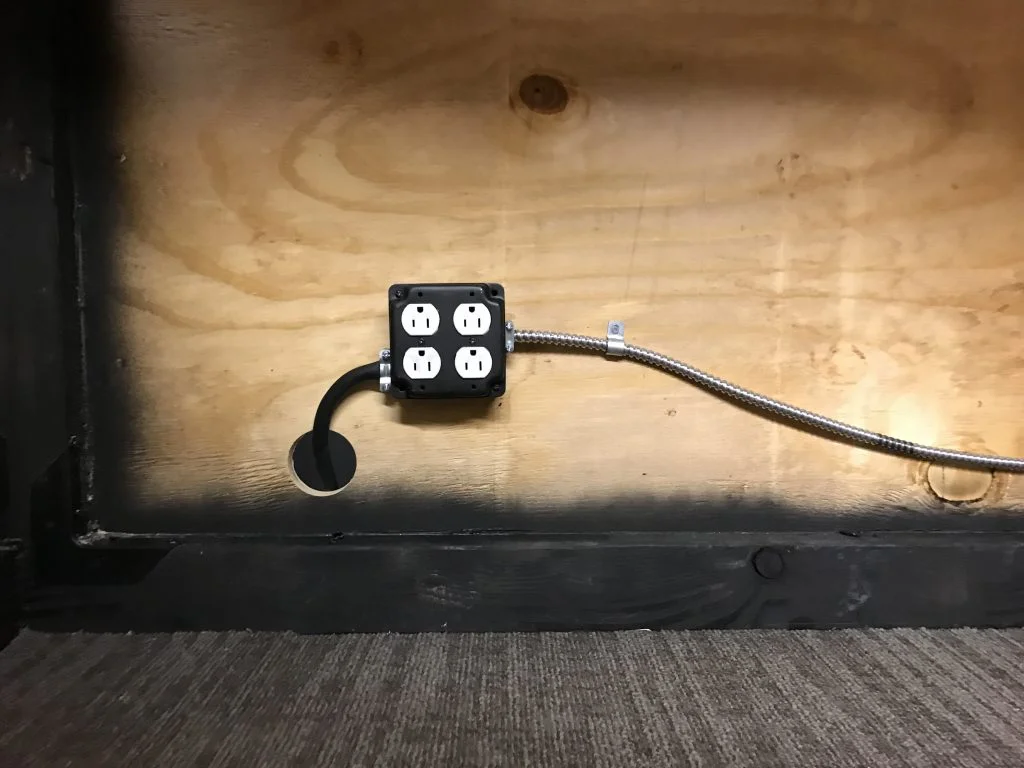
Then we put in a 2×2 power outlet in each quad of the box. For power sake, we wired the top boxes together and the bottom boxes together.
And finally after that we attached rock wool (insulation) to the plywood with some big metal washers and some screws. We also cut the holes and attached the fans (two in each quad).
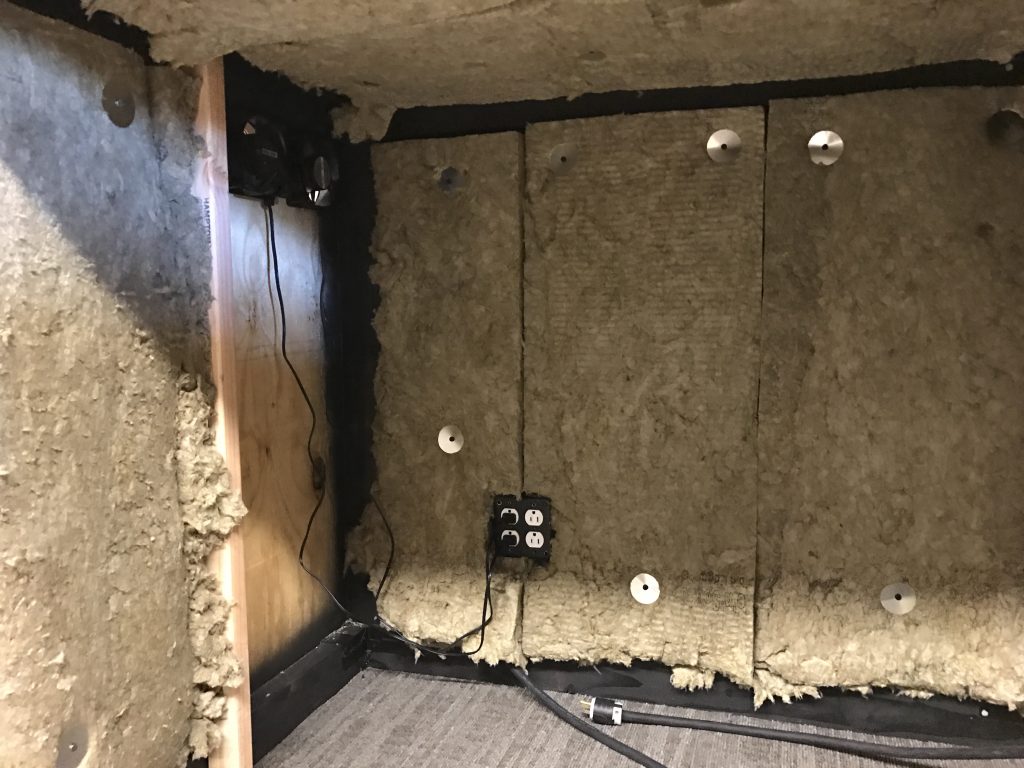
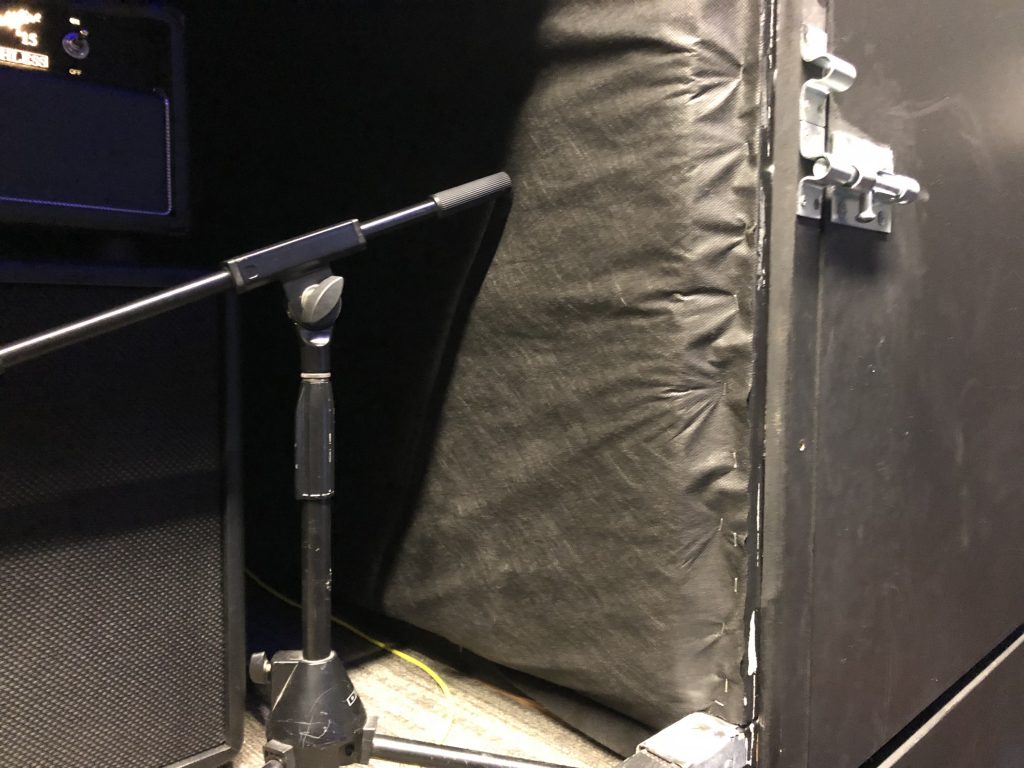
After that, we covered up the fan section like in the image above. We then finished it out with stapling weed blocker fabric over the acoustic treatment. We found that weed blocker material was much cheaper than actual black fabric and did the job well.
Our doors we made out of a different material – MDF. We found that MDF sat much flatter and didn’t warp like plywood. We bought some awesome heavy duty latches, mainly because they look cool. But really because they made for a really tight latch. To make the door seal tighter we put a strip of foam around the edges of the door. Once the latches catch, its a really tight seal. Word of wisdom – spray some black paint where your hardware is going so it looks sharper when its done.

We then painted the outside black. Got a ladder that’s permanently stored next to the cabinet, since its a little high to lift a heavy amp into the top half. Tech wise, we have a SGI in each of the quads for input signal, and we have short booms with mics in each quad with XLR going out to the patch bay. There’s enough room for each amp to sit in pretty much any orientation and we’ve yet to encounter an amp that doesn’t fit yet (that I know of – ha).

The result was pretty awesome. Great sound isolation, and about as much airflow as one could want. Hope this helps! Enjoy!